Steps to Create a Quest
1. Defining the Quest
Choose a clear and specific topic or goal for your Quest. For example, “Weight Loss Goal” or “Understanding Stress Triggers.” Ensure the topic aligns with your research objectives or the insights you want to gather.2. Create a Quest
.jpg?fit=max&auto=format&n=bd62qvdKSLQ-9o7W&q=85&s=53277d8ecc3ef15a31b95e0ca2375bff)
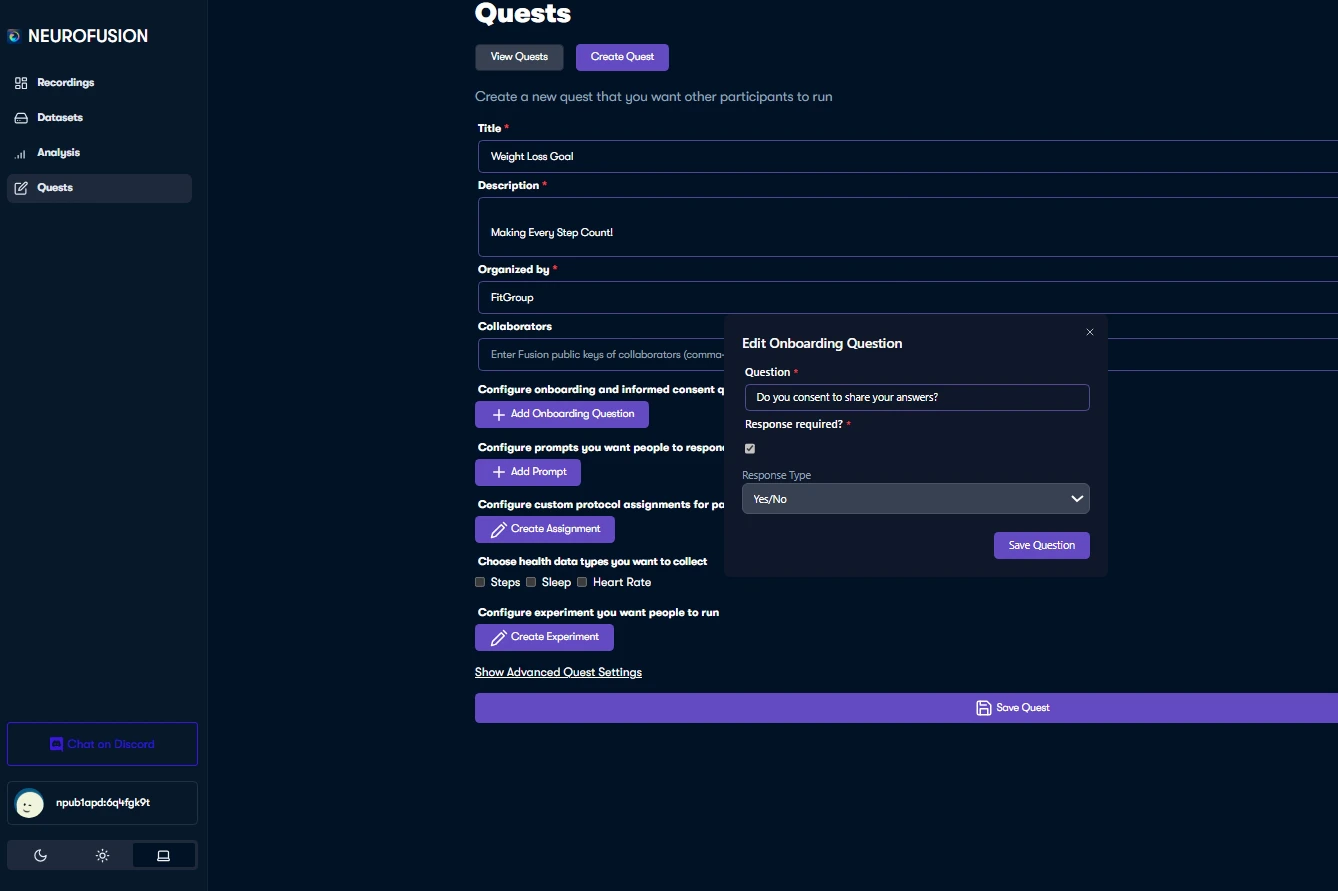
3. Setting up Quests
First fill in the form with titles marked as important..jpg?fit=max&auto=format&n=bd62qvdKSLQ-9o7W&q=85&s=9a3aeb7c117a89f94db64f0403241587)
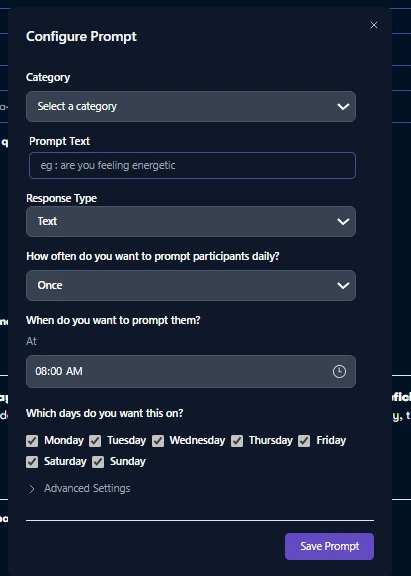
- Categories : Filter the prompt question into specific categories to organize and tailor the data collection process. eg Health/Wellness, Productivity etc
- Prompt Text : Clearly state the question or instruction to participants.
- Response Type : Define how participants should respond, such as Yes/No, Number, Custom Options, or Text.
- Frequency : Set how often the prompt should appear, like daily, hourly , etc.
- Time Schedules : Specify the exact times and days of the week when prompts should be delivered to participants.

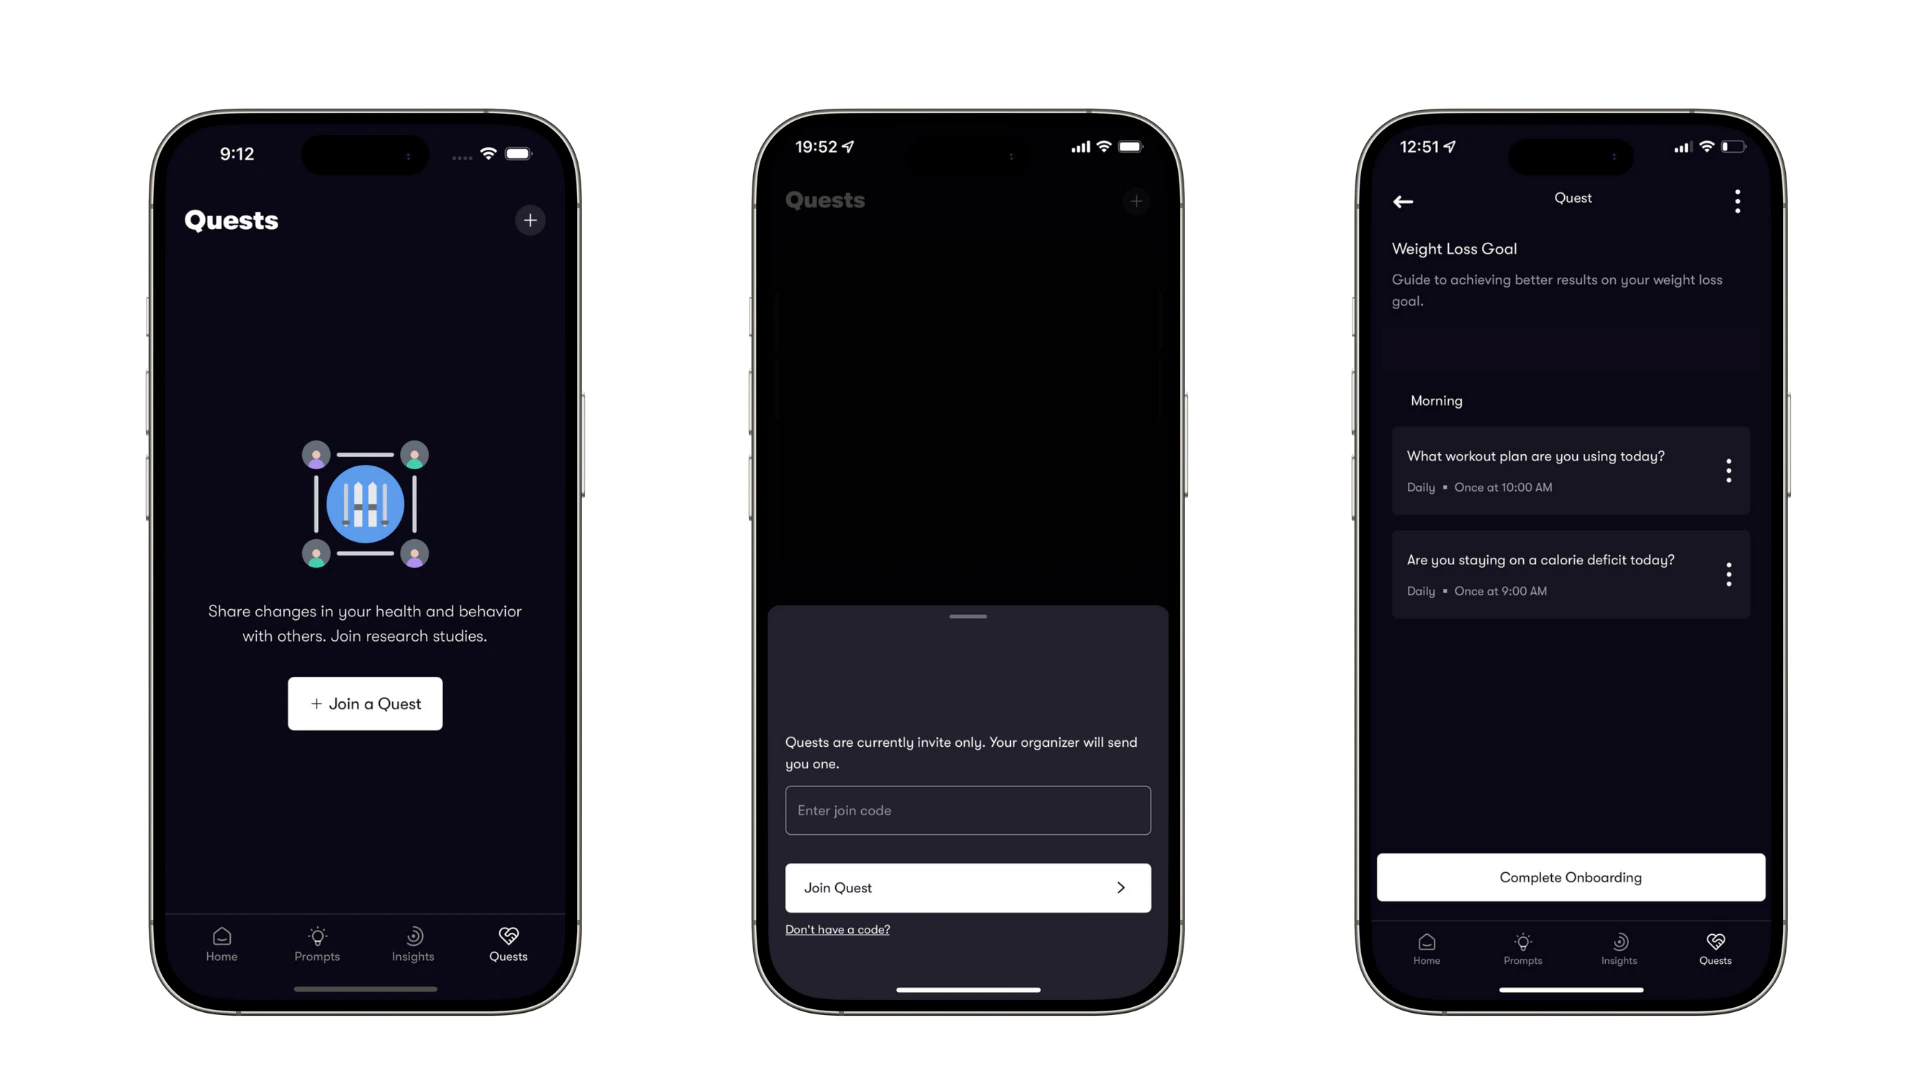
4. Scheduling and testing Your Quest
After creating your Quest, carefully review any prompts you added to ensure accuracy and clarity. Once satisfied with the configuration, save your Quest. This will generate a unique Quest code. Next, open the Fusion Co-pilot app, navigate to “Quests” on the app. Enter the unique Quest code generated in the previous step to launch your study.
5. Publish and Share Your Quest
Experimenting with Quests
The Fusion platform allows you to experiment with different prompts, question formats, and response types. This feature can be used to:- Test variations of prompts to see which ones yield the most insightful responses.
- Compare long-form and short-form answers to determine which format works best for your research.
- Analyze real-time data to make adjustments and improve your Quest.